Create Record
The Create Record scheduler job is designed to automatically generate new records based on the criteria specified in the Record Configuration section for every record returned by a defined SOQL Query.
Step 1: Register the Scheduler Job
- To register a new Scheduler Job, navigate to Breezz Setup → Scheduler Jobs and click New.
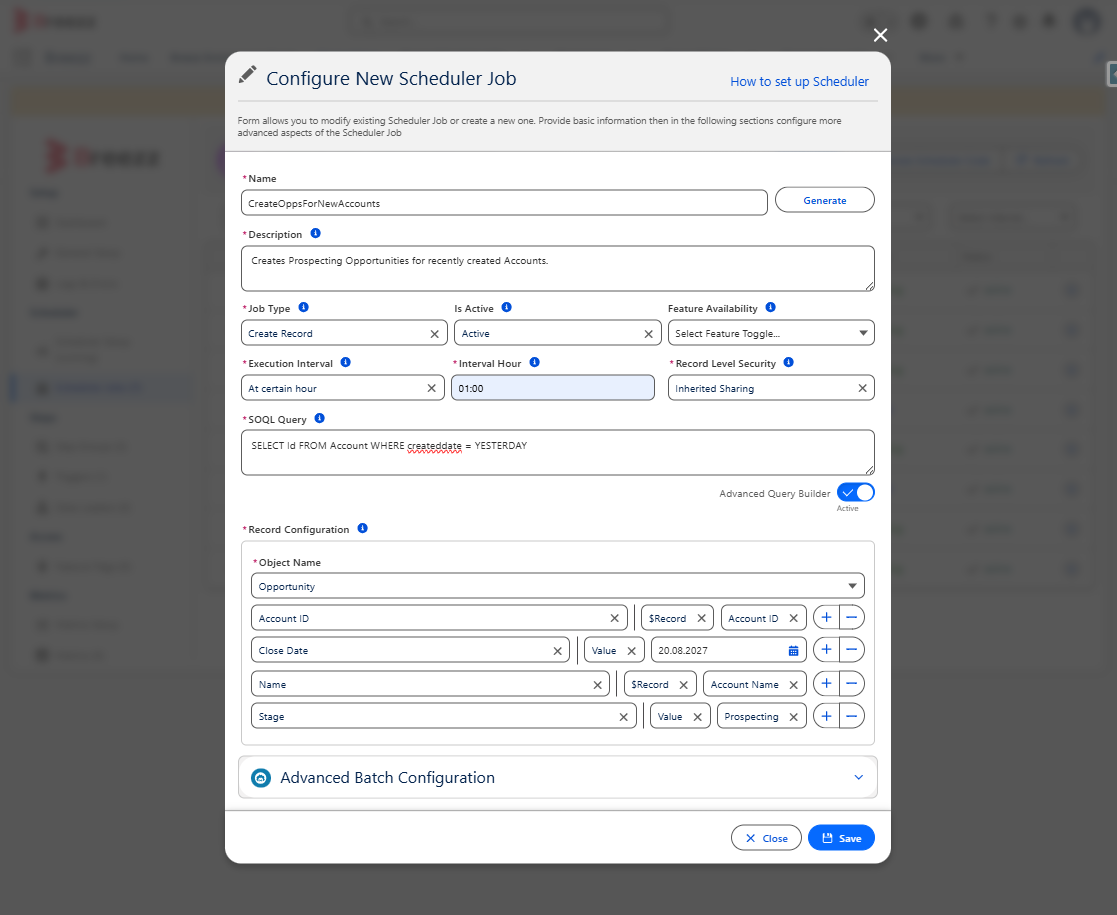
- Populate the configuration form with the following details:
- Name: Provide a clear identifier for the Scheduler Job.
- Description: Enter a comprehensive explanation of the job’s purpose.
- Job Type: Select Create Record.
- Execution Interval: Define when the scheduler should execute (e.g., Daily at 01:00 AM).
- SOQL Query: Provide a
SELECTstatement to define the exact records the job should process. - Record Configuration: Select the target Object Name you want the scheduler to create. Provide the new record details, ensuring that all required fields (marked with an asterisk) are populated.
- After filling out all required fields, click Save and re-run the Scheduler from the Scheduler Setup or trigger it manually.
Step 2: Verify the Scheduler Job
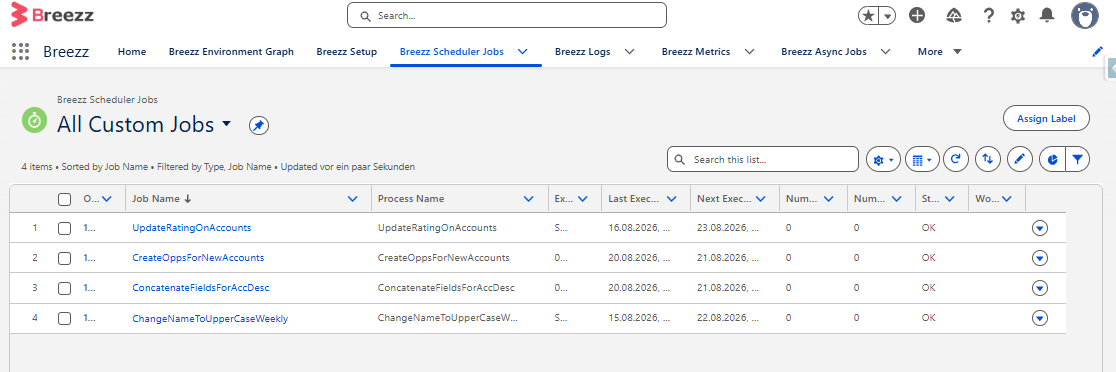
To confirm that the scheduler was created successfully, navigate to the App Launcher → Breezz → Breezz Scheduler Jobs → All Custom Jobs.
You should see your new Scheduler record listed here:
ℹ️ Note on Data Volumes: The standard Create Record job type is designed to run frequently on smaller datasets. If you need to process large data volumes (e.g., 10,000+ records), you should use the Create Record - Batch job type instead, which is detailed on the next page.