How to Create a Custom Step
The steps below describe how to create a simple Custom Step, write the underlying Apex logic, and register it within a Step Group.
Step 1: Configure the Breezz Step Group
First, you need to create a Step Group - a collection of Steps that defines the execution order and processing rules.
- Open Breezz App.
- Go to Breezz Setup Tab.
- Click Step Groups sidebar tab.
- Click New Group button.
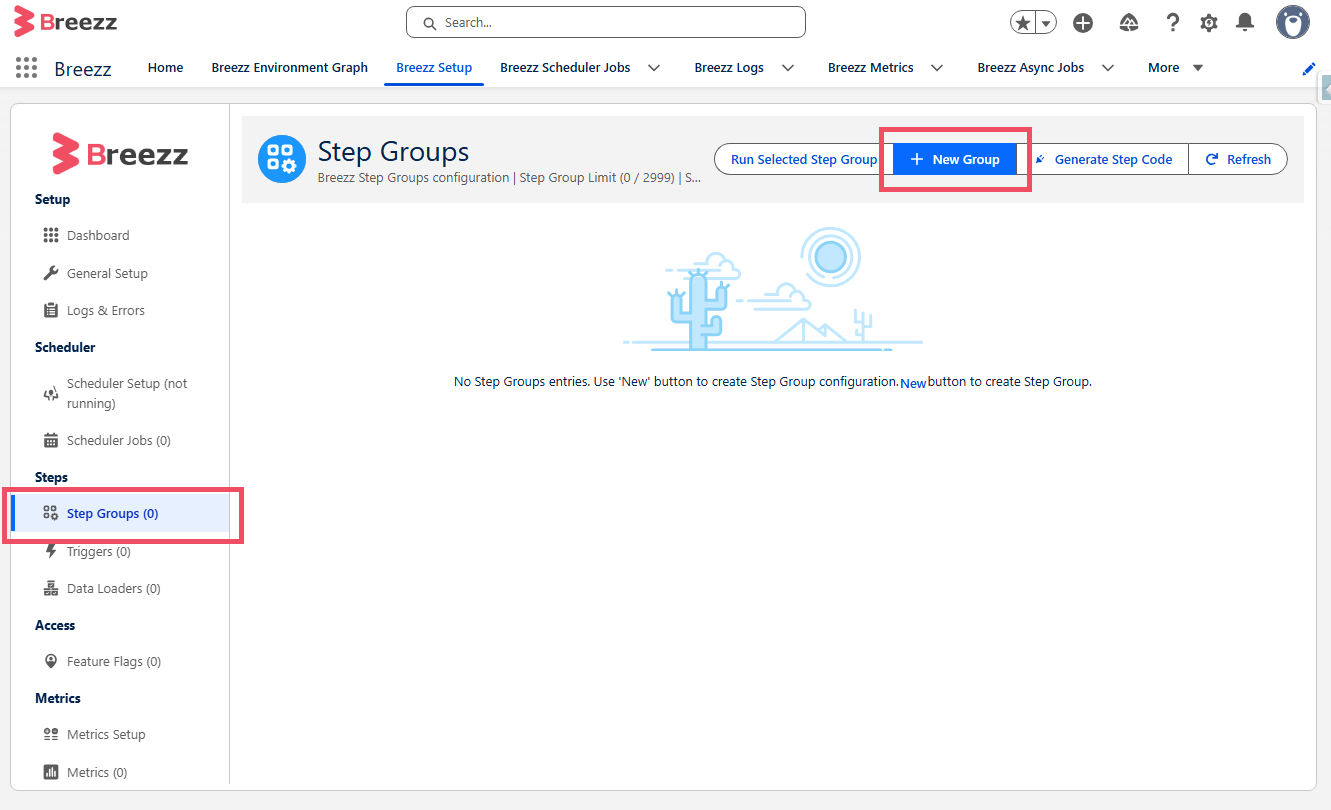 After clicking New Group, the configuration form will appear.
- Provide details:
- Name:
ToUpperCaseFieldSteps - Description:
Changes all characters of an object field to uppercase. - Record Level Security:
Inherited Sharing(the security context used for DML operations). - All or None:
Partial Success - Type :
Custom
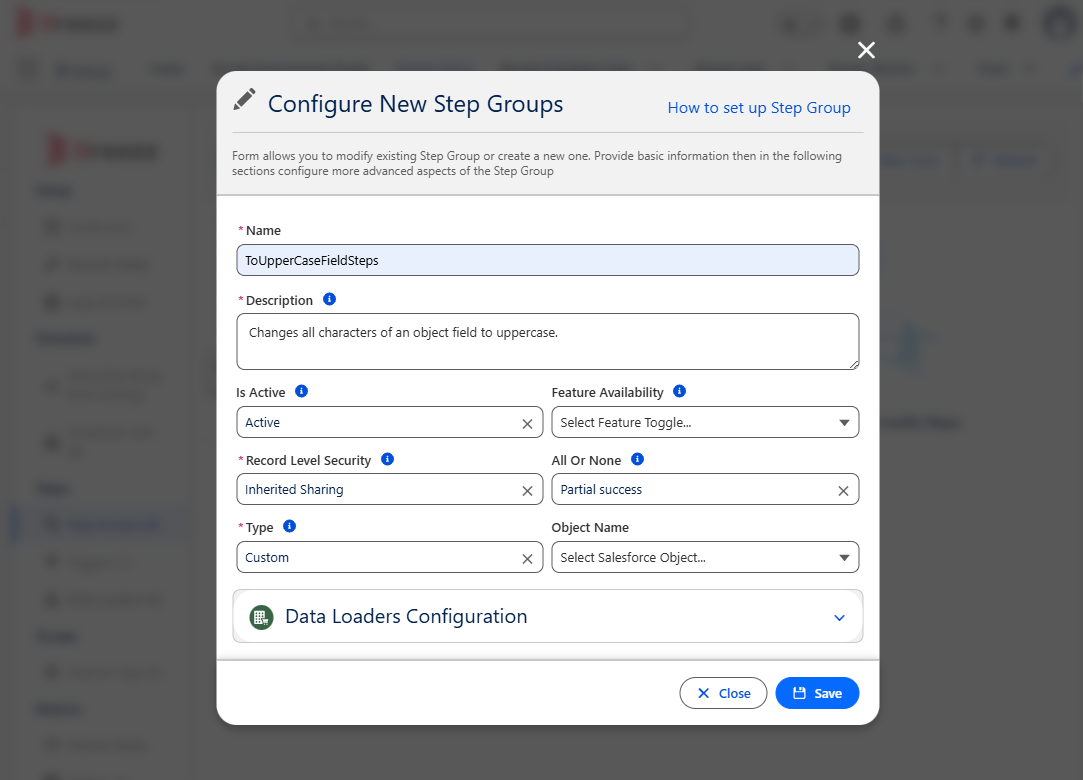
- Click Save to proceed.
Step 2: Create the Step Class
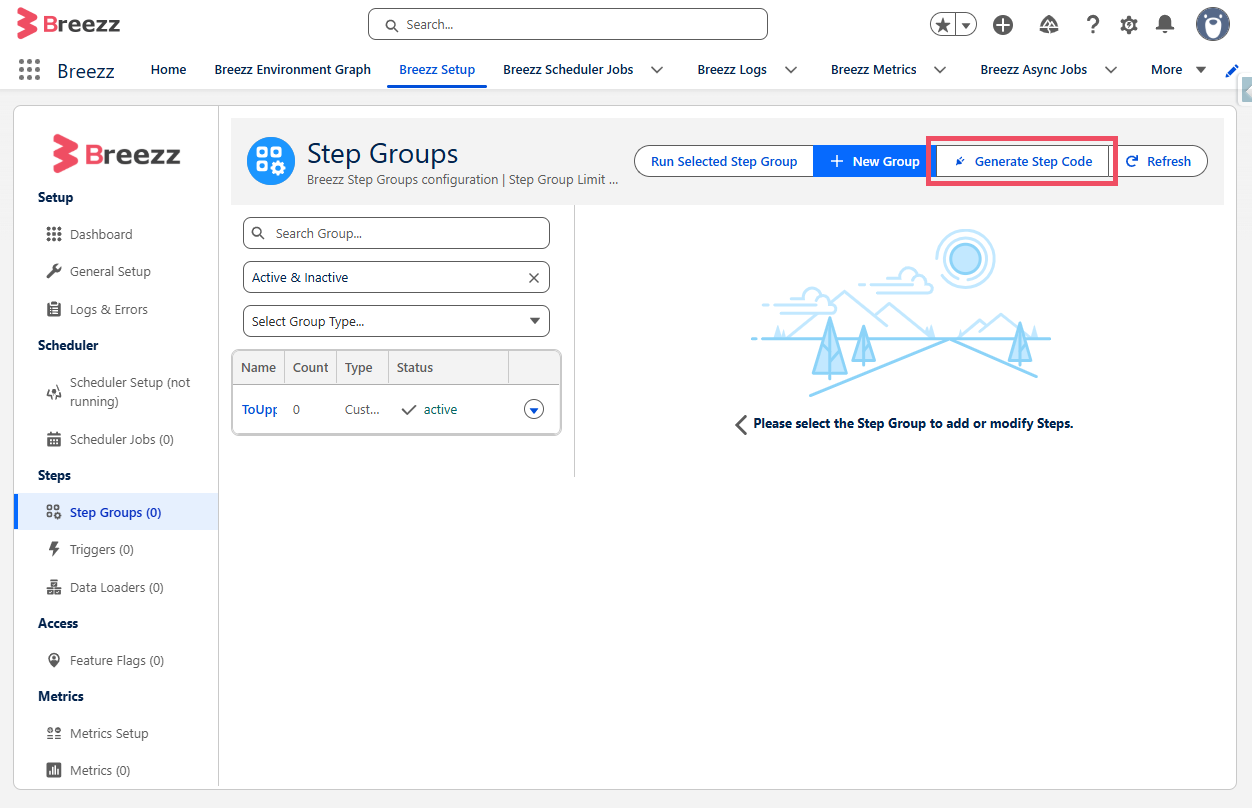
Now that the group is created, you must introduce a new Apex class containing your logic. Every Custom Step must extend the forvendi.Step abstract class. To streamline this, use the Generate Step Code tool.
- Click Generate Step Code.
- Copy the code below by clicking Copy to Clipboard and paste it into the Class window. The name will be fullfiled automatically. The generated boilerplate code is ready to use. Your custom functionality should be placed within the
initRecordProcessingmethod.
// The class must extend the forvendi.Step abstract class
public with sharing class UppercaseNameFieldStep extends forvendi.Step {

    public UppercaseNameFieldStep() {
        // A public default constructor is required.
        // For technical reasons, the class name must be passed to the super constructor.
        // This ensures the framework can execute the step asynchronously and generate correct logs.
        super(UppercaseNameFieldStep.class.getName());
    }

    public override Boolean initRecordProcessing(Object record, Object optionalOldRecord) {
        // Cast the record parameter to SObject (assuming we are passing Account records)
        SObject sfRecord = (SObject)record;
        String recordName = (String)sfRecord.get('Name');

        // Manipulate the object data
        sfRecord.put('Name', String.isBlank(recordName) ? '' : recordName.trim().toUpperCase().replace('  ', '_'));

        // Return false to indicate we have all the data needed to finish the process in this context
        return false;
    }
}- Click Deploy.
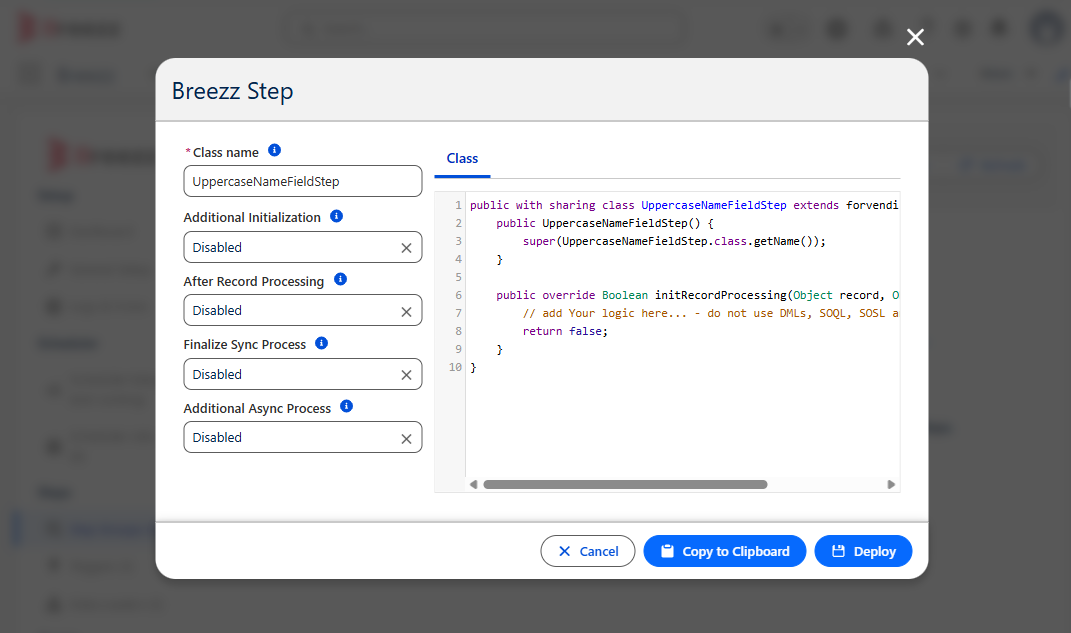
Note: The provided class simply formats the Name field of an SObject. Deploy this class to your Salesforce org before proceeding to the final step.
Step 3: Add the Step to the Step Group
With the Step class successfully deployed, you must link it to the Step Group created in Step 1.
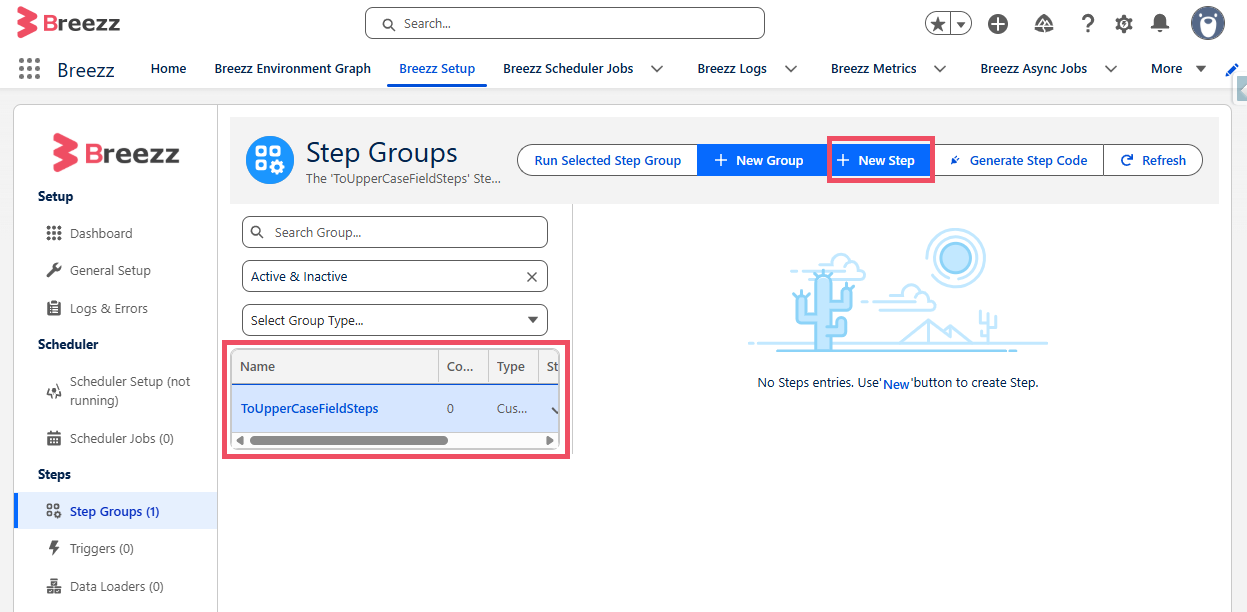
- Select your previously created Group.
- Click New Step.
- Provide details:
- Parent Group:
UppercaseNameFieldStep. - Name :
UppercaseNameFieldStep. - Description :
Changes all characters of an object field to uppercase. - Order : 1.
- Type:
Custom. - Step Class Name:
UppercaseNameFieldStep.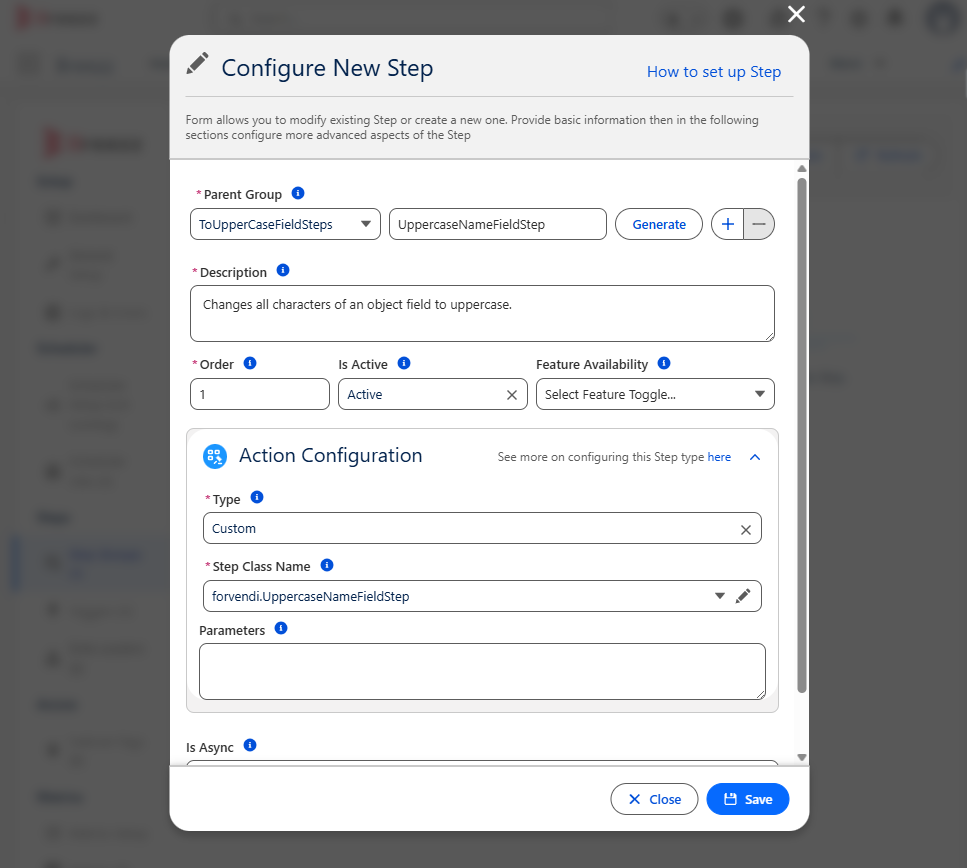
- Click Save.